Behind the scenes of the "Heirloom" Lightsaber
I was finally the closest I'd ever been to becoming a Jedi.
Ever since childhood, Star Wars has inspired me; it's a major reason I decided to work in the film industry.
So when I stumbled upon a Graflex flash handle - just like the one used to make Luke Skywalker's iconic lightsaber - on Craigslist last summer, I journeyed to Detroit to purchase it.
With Star Wars shaping much of my childhood growing up, owning a prop from the film franchise has been a dream of mine.
Now, with the equipment, technology and help of the replica film and television prop community, I was ready to begin my own journey into this world, just like Skywalker made his journey to becoming a Jedi.
This post shows, in detail, how I created my own lightsaber.
My first vintage 4x5 Graflex outfit with the original 3-Cell flash handle.
Unfortunately, though, the majority of the vintage Graflex camera collector community don't hold the Star Wars prop folks in high regard as they tend to dismantle working vintage camera equipment. Being an avid camera collector myself (I have far more cameras than any well-adjusted member of society should own), I wanted to make sure that the flash retained the ability to be used as a flash again if I wanted. Especially happy to find the kit in excellent condition, I was interested in using the camera to learn black and white film development.
My first self developed photograph. Shot with the Graflex camera that the lightsaber in this picture (my first version) used to be the flash handle for. Graflex-seption.
To my delight, I found out quickly how helpful and wonderful the replica prop community is. (Namely the Replica Prop Forum, and FXSaber Forum) A vibrant and active group, they are all willing to help problem-solve and are eager to share their processes and techniques used to bring their projects to life. I could not have completed this project without their support and the groundwork they had put into place researching the minutia of these props.
Every external detail of this iconic saber has been scrutinized for years since the first person decided to make a replica of one. Pages of heated forum posts are dedicated to discussing whether or not the original props used rivets or screws to fasten the rubber "t"- track grips to the handle. Everything from the HP-44 bus-type connector circuit board that adorns the clamp box on the side of the saber to the Kobold d-ring and metal bracket (which actually comes from another vintage camera flash) that attaches to the bottom of the saber have been thoroughly researched and confirmed to be what the original prop masters used back in 1977. Countless people put in the hard work for decades to identify these details (check out Parts of Star Wars for more in-depth information into these details) and make them available for fellow fans like me to make our own replicas.
Some of the parts required for a screen-accurate replica lightsaber.
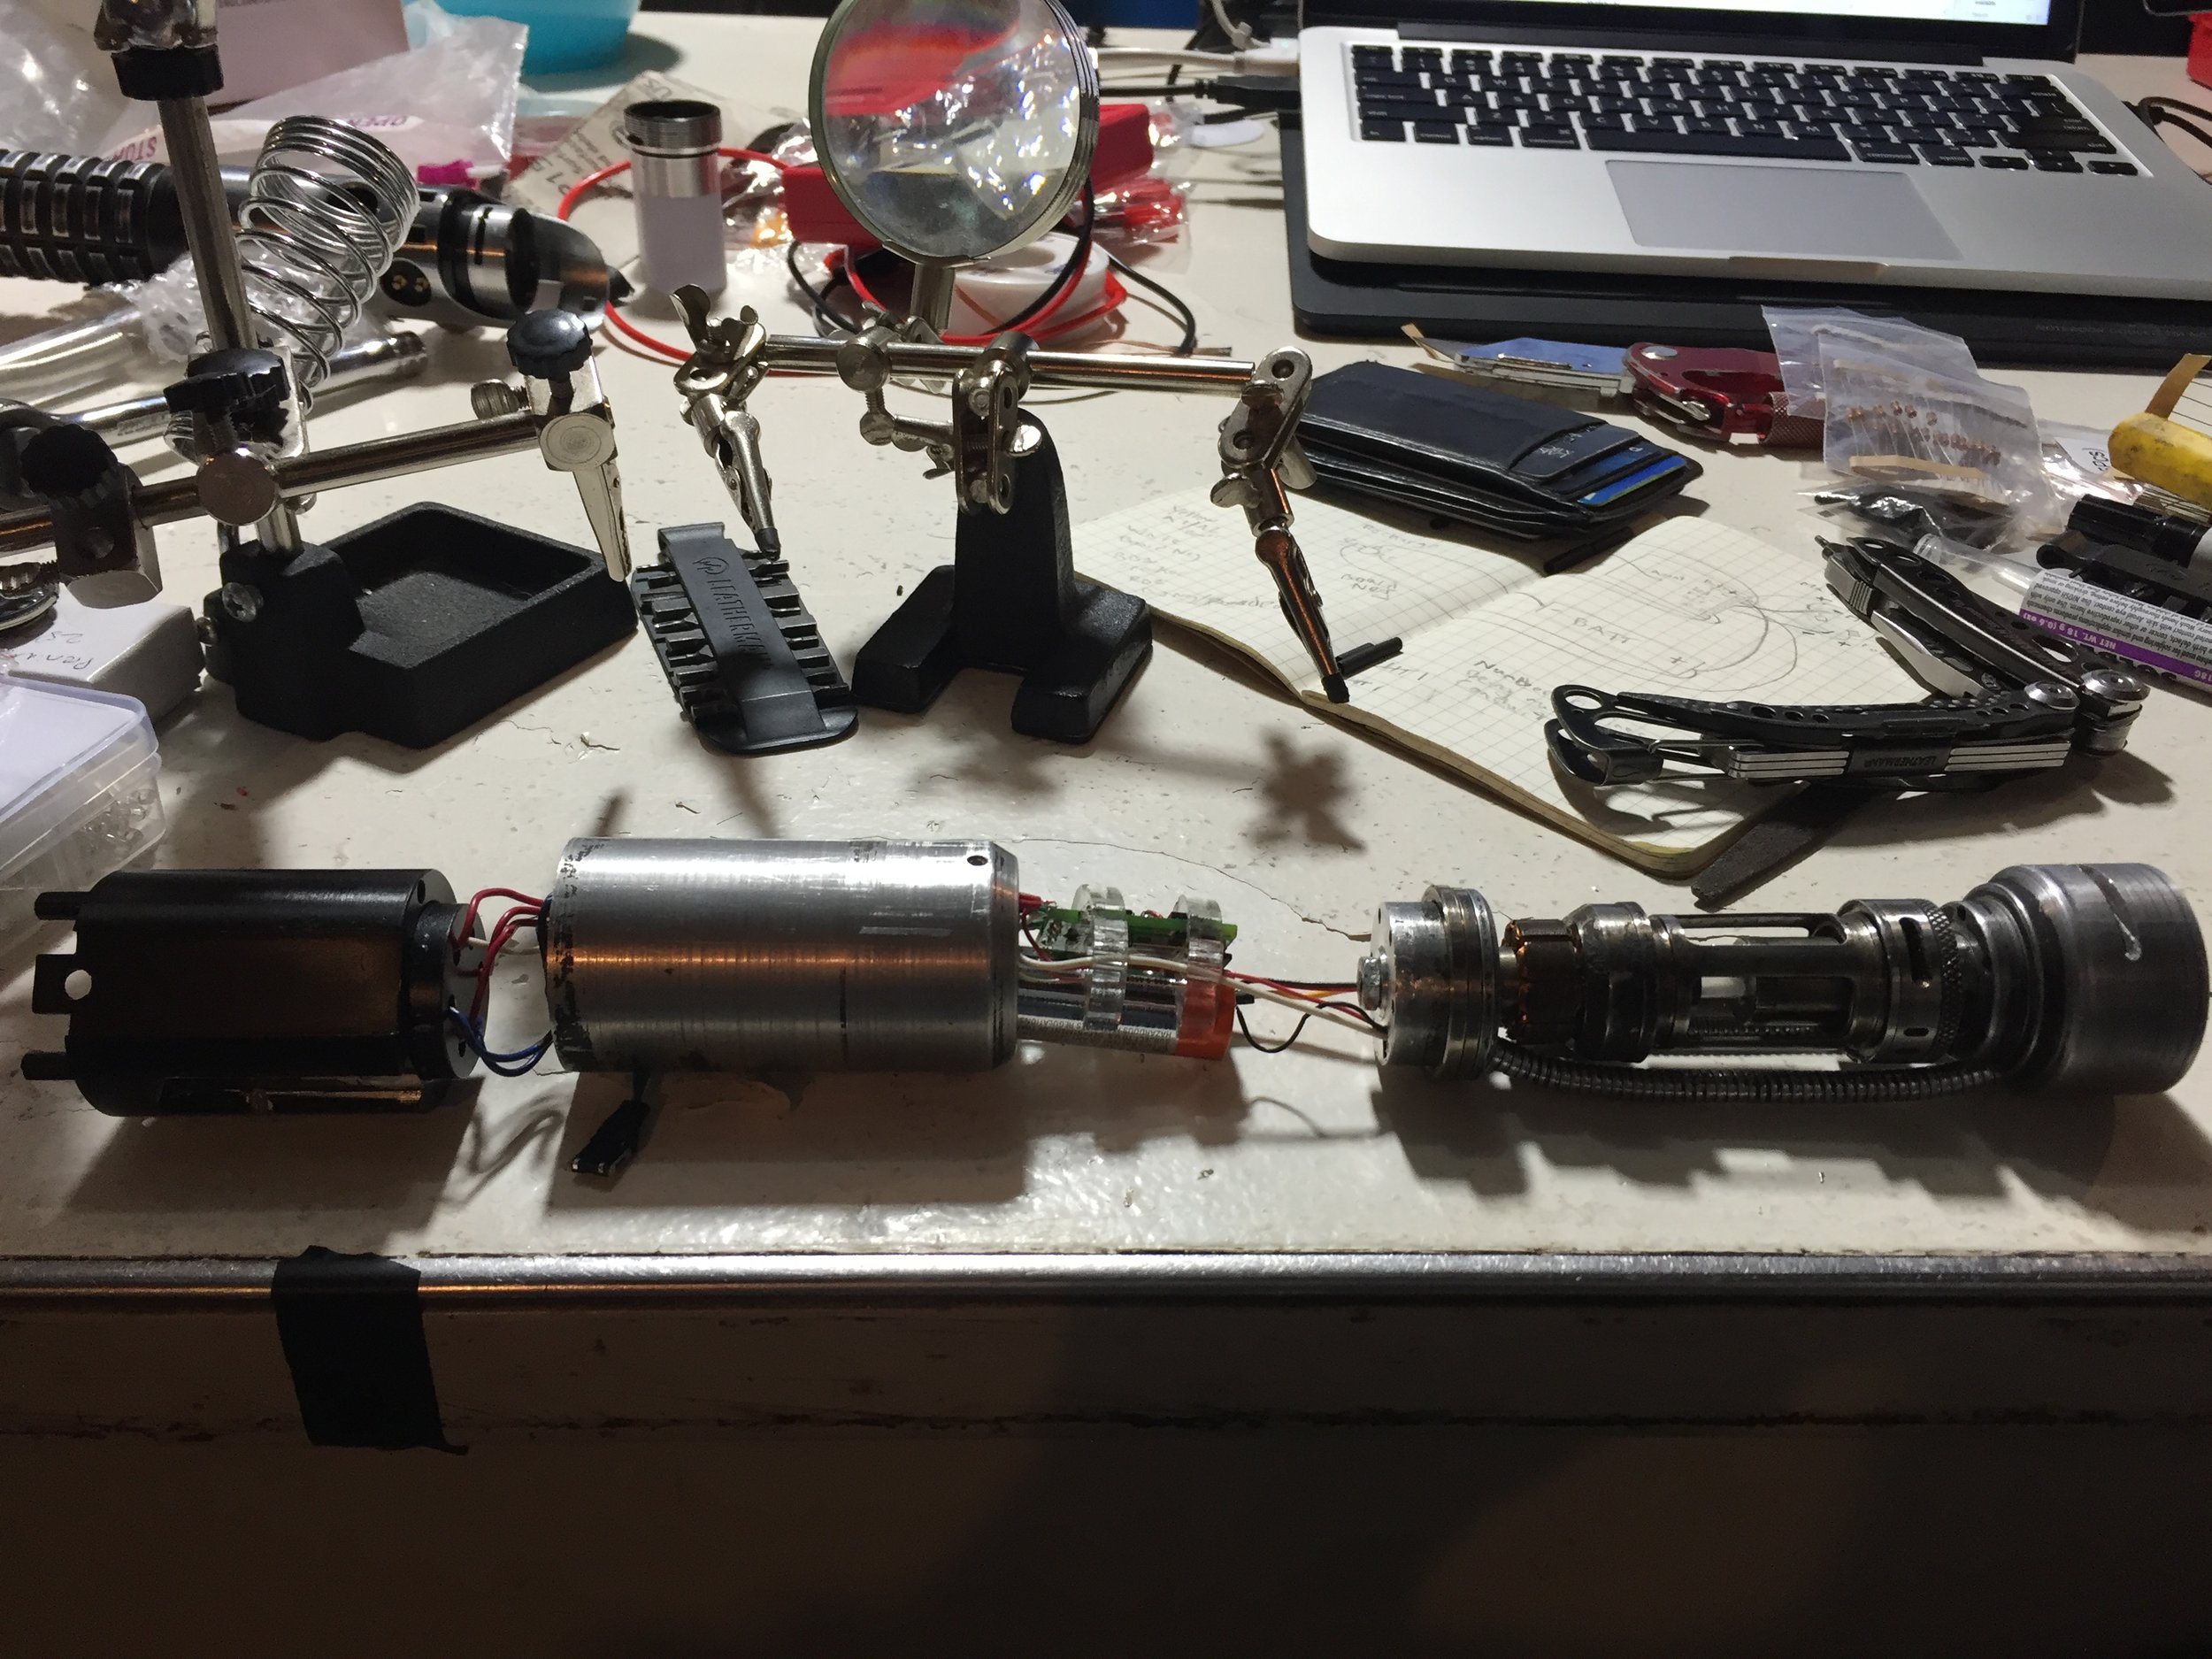
After completing its conversion into the prop as seen in the movies, I felt it could be even more and set about imagining what it might look like on the inside. This set me down a path of learning, frustration and finally satisfaction. I also picked up new skills in machining and metal working I had never considered could be part of my arsenal in the past.
Here is the beginning of the machining process of the main inner-body of the saber that houses all of the electronics.
In the spirit of the original prop makers on "A New Hope," I wanted to make use of some found parts in my build. The idea of taking something used in real life and re-contextualizing it is an interesting concept used constantly by prop makers. I employed parts found in old computer hard drives, LED light fixtures, cameras and electronic cigarettes to bring to life the inside of a lightsaber. The main portion of the crystal chamber chassis is a modified e-cigarette liquid tank. These have such a futuristic look to them that I knew immediately that I wanted to use one in my first scratch build.
My first mock up using the e-cigarette tank and hard drive parts and a chalcanthite crystal (which unfortunately broke before the saber was finished).
After deciding the direction I wanted to go with the crystal chamber, I needed to figure out how to run wiring from the main body to the LED illuminating the crystal. I wanted to hide the wiring as to make it seem as futuristic and clean as possible.
To do this, I discovered I needed some sort of wire shielding or conduit to run it through to keep it out of sight. After talking with the venerable, Slothfurnace (Brad Lewis, an amazing machinist/designer and one of my Star Wars replica idols) I was pointed to the use of flexible LED laptop lights as a perfect source of small flexible metal conduit that I could pass wires through unseen.
One of my main goals with this build was to add weathering to the finished saber to give it that classic "used future" look that makes the "Star Wars" franchise so special. I have had very little experience with weathering in the past, but figured I'd be able to make something work, and after much research, I found some solutions that gave me the looks I was going for.
The LED laptop lights before adding the black oil paint, but just after sanding. The top one is before sanding and the bottom is after.
With a lot of sanding, some heat and black oil paint, I was able to knock down the sheen on the laptop lights to something I was happy with. I used a similar method with the stainless steel of the crystal chamber, but instead of oil paint, I used coffee!
This took a bit of research to figure out, but if stainless steel is heated to red hot and buried in wet coffee grounds, the coffee will stain the steel a dark brown. Additionally, I let some of the coffee burn to the outside of the chamber which caused a fantastic buildup that looks like it has been around for years. It also had the added bonus of causing the saber to smell like coffee for at least a week afterwords.
Before weathering.
After weathering.
Additionally, I used gun refinishing chemicals on the aluminum and brass parts of the chassis, and sanded them down to give them a well-used feel.
After the weathering was completed, it was time to tackle the wiring. The order of operations for this next part was crucial as everything needed to be mapped out an in place before the wires could be soldered together. Due to the amount of wiring that needed to run from the top of the saber to the bottom, fitting everything through conduit was a bit of a challenge and required me to run different electrical buses from the main board through to the bottom chamber where the speaker is stored.
Wiring running is fun!
Once all of the wires were correctly run, it was time to measure the lengths of the wires to cut them down so that there was enough room to fit everything inside the main body and solder everything up!
All wired up.
Lighting up for the first time.

It's alive!!
This project was an amazing experience and challenge for me. It opened my eyes to a whole new world of possibilities and uncovered new passions of mine. I'm already working on a new more custom design that I hope to have completed before the premiere of Episode VIII for another on of my vintage Graflexs (as of writing this post I now own 4 vintage flash handles).
Since I work on commercials for a living, I was planning on shooting some cool shots of the saber in my wooden box and posting a video of them set to some cool music to the lightsaber communities online. I ended up getting a little carried away and instead made a short teaser trailer for a fictitious Star Wars movie titled, "Heirloom" You can check out that trailer on the website here.
It's not complete without Maz Kanata's wooden box!